
This is a quick tutorial on how to subscribe to your Táve calendar feeds from Microsoft Outlook so that your Táve events will show up alongside your other Outlook calendars. These steps apply to Microsoft Outlook 2013, so if you are using a prior version it may vary slightly.
Creating Your Calendar Feeds in Táve
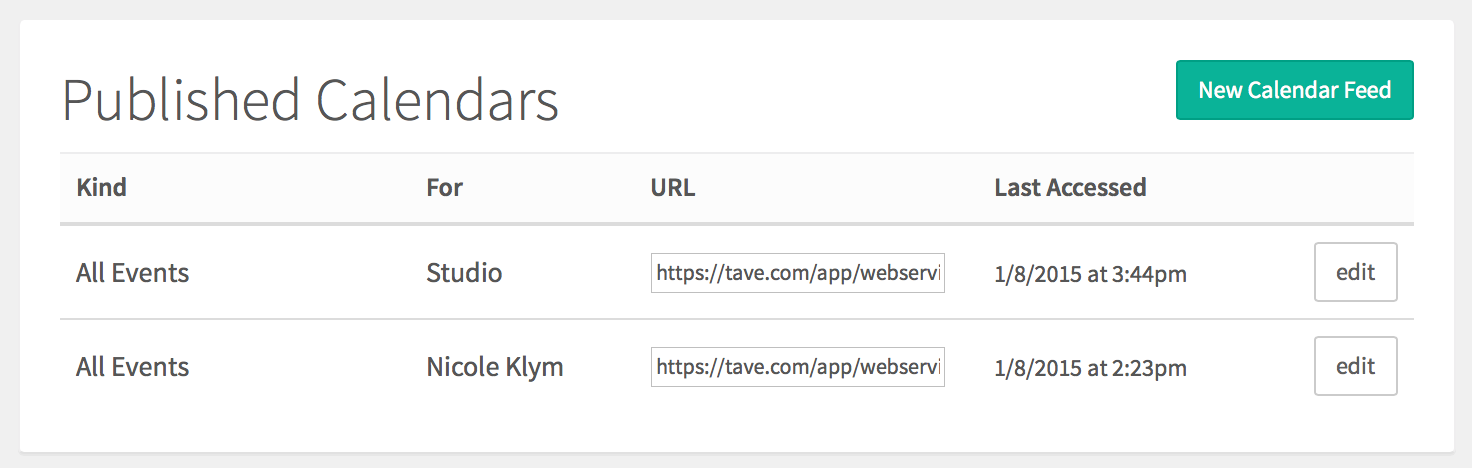
The first step is creating the Táve calendar feeds you’d like to use. You can create a number of different feeds based on your needs. For example, if you have multiple employees in your studio you can create a feed that will show only events that the individual employee is an attendee on. If you’d like to give someone a more private feed of just your availability shown as simply “busy” or “free”, you can do that too. You can create these feeds in Settings › Data › Calendar Feeds by clicking on the New Calendar Feed button as shown below.
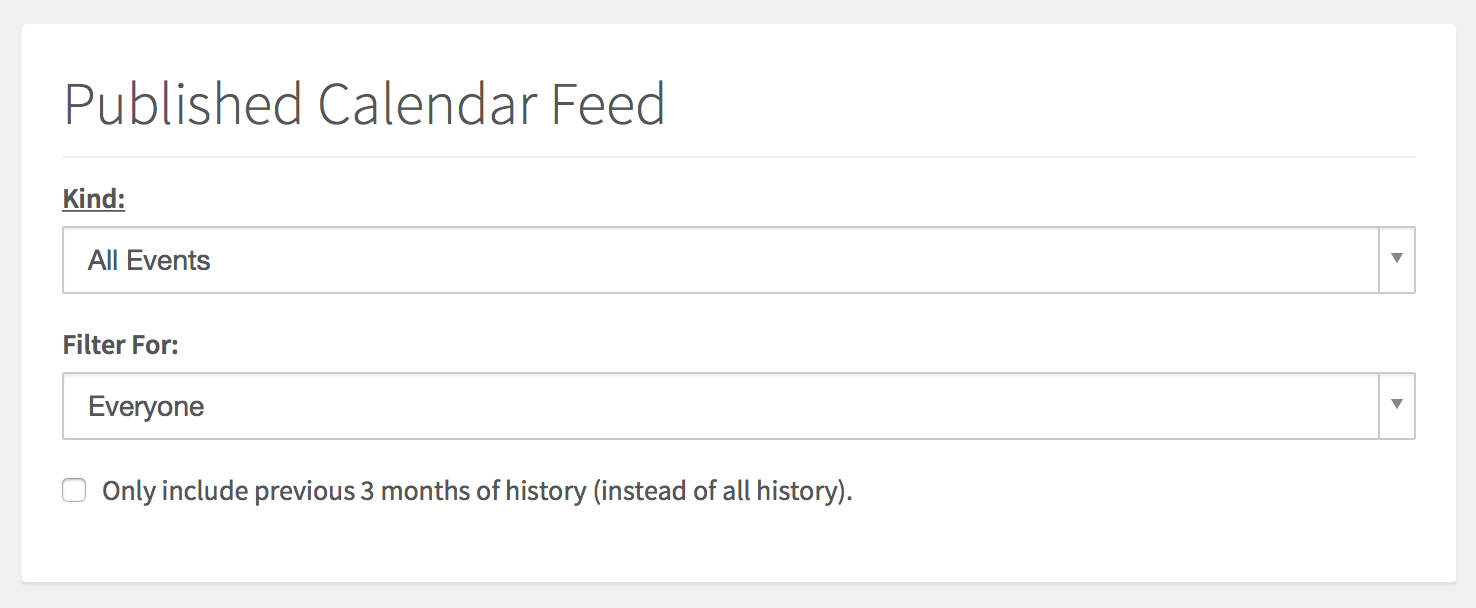
After selecting the “New Calendar Feed” option, you’ll select the kind of events you want published in this feed. All events, availability (busy/free), only confirmed events and only tentative events are your 4 options. Next, you’ll select the users you would like to filter the feed for. This will determine whose assigned events you’ll see (they must be an event attendee as shown below). The last option is to restrict the feed to show only the past 3 months of history, as opposed to the default showing the entire history of events, if you prefer this option.
Once you’ve saved the new calendar feed, you’ll see a URL created (as seen in the top screenshot above). These URL’s are what we will need later to setup the feed subscription in Microsoft Outlook.
Adding Your Calendar Subscription in Microsoft Outlook (for PC)
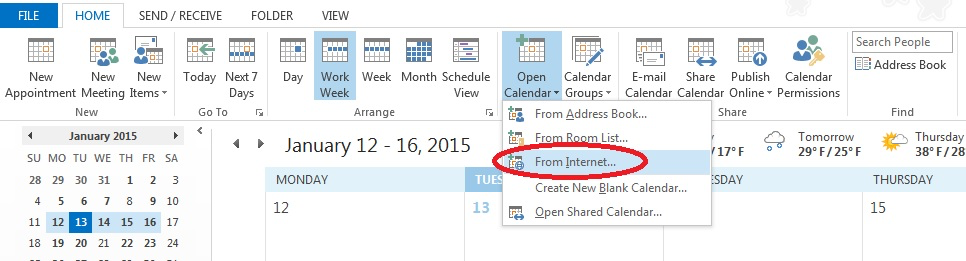
Subscribing to your Táve calendar within Microsoft Outlook is a simple 3 step process. First, when in the Calendar view in Outlook, you’ll navigate to Open Calendar › From Internet.
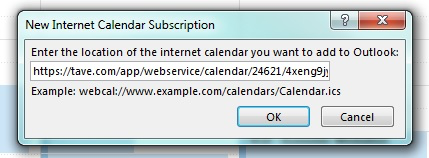
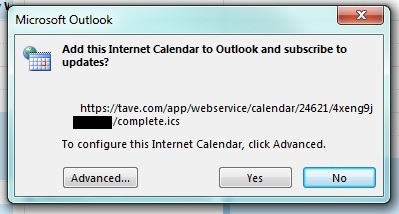
You’ll see the following pop up window, where you can paste the Táve calendar feed URL you created in the initial steps up above and select OK.
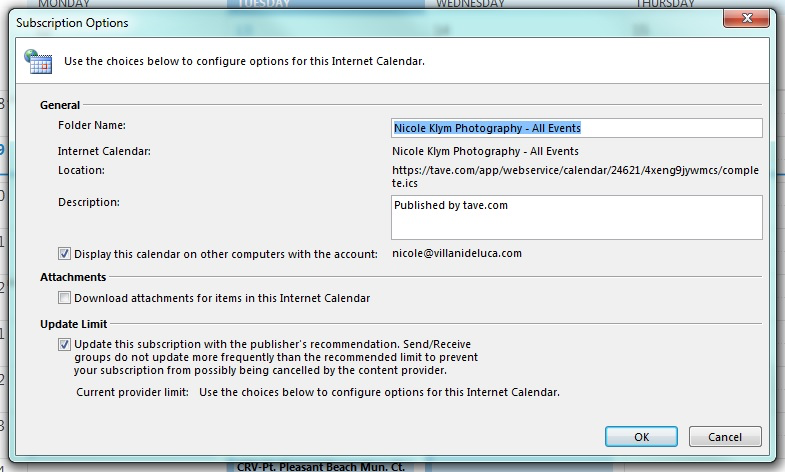
After entering your calendar feed URL, you’ll be prompted to confirm the subscription. To confirm as is, you can select Yes here. To customize your calendar feed’s name and other settings, choose the Advanced button first before confirming the subscription.
After confirming your Outlook calendar subscription to your Táve calendar feed, it will take a few moments to import your current feed and then it will continue to pull in new changes per the Outlook calendar sync settings.
Calendar subscriptions can be added, changed, or removed from the Account Settings dialog box. From the File menu, click Account Settings, and then click the Internet Calendars tab. You can modify or delete a current calendar subscription here.
Adding Your Calendar Subscription in Microsoft Outlook (for Mac)
Log in to OWA at https://outlook.office365.com and click the Calendar button at the top of the screen.

Locate and right-click or Control-click Other Calendars in the navigation pane on the left. Choose Open Calendar.

In the Open Calendar dialog, paste the Táve calendar feed address into the Internet Calendar field and click the Open button.

Within a few seconds, the Táve feed appears as its own calendar. The events on the new calendar overlay with existing events.

View the Táve Calendar in Outlook for Mac
In Outlook for Mac, open the Calendar view for the Office 365 account. The new Táve calendar will appear there too. The new calendar actually appears on any device accessing the Office 365 calendar such as mobile phones and tablets (e.g. iPhones and iPads).